Showing posts with label halloween. Show all posts

Sunday, August 25, 2013

Halloween 2013 will be Intergalactic


At least, I hope so. I've been reluctant to confirm, even in my head, the idea that has been knocking around in there for the last few days because of the sheer work that it promises to entail. I'm not averse to putting excessive hours into a Halloween project (clearly!) but real-world commitments threaten to be a little more imposing this season, and part of me thinks that this idea would push me for time were I free as a bird. 

However.

Upon inspecting the date of my first post on the blog last year, I noticed that I was similarly tardy in getting into gear last Halloween, and that worked out okay. It was, in fact, this very date last year. And, much like this post, it was a mere declaration of intent without having made any meaningful start. It wasn't without some stress, sure, but that made it all the more gratifying in the end. 

This idea is predicated on the sheer fun of building a team costume last year. The final costume will likely be bigger, but mercifully there are likely to be less individual components. And, while I thought it would be hard to top the recognition that last year's duo would garner, I think this team-up would make at the very least a good stab at it. 

This year, we will go on an earth conquest mission as the lovable alien duo Kang and Kodos, of The Simpsons fame:
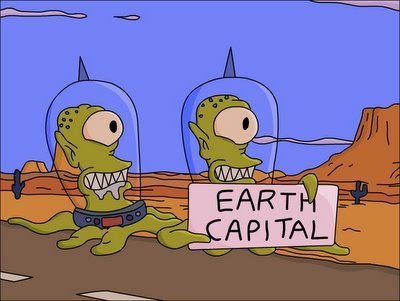
Actually, we're Quantum Presbyterians.

Sure, The Simpsons isn't what it used to be (in my eyes anyway) but it has left an enduring legacy of lovable characters and endlessly quotable nuggets of wisdom. This costume idea ticks pretty much every box I have when it comes deciding on a project. It's big, it's eminently recognisable, and it fits the profile of previous work in terms of workflow. It also ticks a recent addition to the criteria list materialising out of last year which is, where possible, a team costume is the way to go.

It will be a long two months with plenty of peaks and troughs, but I wouldn't have it any other way.

Saturday, November 3, 2012

Halloween 2012 in Pictures

One of the reasons I frequent the same club every year is the effort they put into documenting the night. Usually my costumes are too cumbersome to carry a camera, despite my own strong interest in photography. It's a real conflict, because this is exactly the type of photo opportunity that I would lap up in normal circumstances were I not part of the subject. In particular, the studio set up that Freakscene puts together is a major attraction for anybody that puts effort into their costume and wants a high quality document of it for prosperity. I have collated those studio images of The Zombies here, in addition to those of the outstanding AT-ST created by my buddy Mark. The studio shots were taken by Nathan Richardson of Splinter Images while photographer David Hegarty shot the walkabout images shown after them. 


Thursday, November 1, 2012

Fully Built: The Zombies


In a post like this, I always find it tricky to find a balance between providing a sufficiently good idea of the steps taken in building the costume and not losing people to inordinate details. It's tricky because the post attempts to synthesise the incremental steps taken over weeks and months (about two, usually) of hard work. Trying to exercise succinctness is challenging when you have one costume to outline; but this year there is double the workload to squeeze in. With that in mind, I'm going to try to keep text to a minimum on this one (and if I have skimped on anything, I'd be happy to elaborate in the comments if prompted).


Halloween 2012

One day, one day I'll actually have my costume done before October 31st so that I'm not running around like a headless chicken on the day. But then again, maybe that 11th hour panic is all part of the festive fun. I woke up yesterday morning to a costume which looked much as it did in my previous entry's photograph. In reality a lot more work had been done (particularly the creation of arms and hands, which had been a lingering worry as we hadn't figured them out until the bank holiday weekend), but the lion's share of decoration still needed to be completed. 

But ultimately we got there, after a day of painting and blow-drying in what often felt like an interminable cycle. The structural issues were put firmly to the test when we finally made our way into town; the walk from the car park to the club took the bones of 30 minutes, where it would take 5 minutes for somebody not laden in several kilos of costume (and whose legs were not obscured by cardboard surrogates). 

The night went very well; as always, good fun was to be had in the club which always attracts the best costumes in the city. People seemed very appreciative of the effort put in as well, which is always gratifying. It was hard to get around (cardboard legs and a club full of stairs is a bad combination) so it was hard to get into the thick of festivities at times, but in the latter part of the night we were able to put our costumes backstage in order to get more involved with the night's action. That was, I'm hugely satisfied to say, after we'd been on stage having been announced as winners of this year's competition. A nice cash prize and this guy to bring home:


I plan on doing a write up on how the bride and groom were constructed, but allow me to skip a few several steps to show you the final costumes:


Monday, October 29, 2012

Flying in the Face of Tradition

The bride and groom aren't supposed to see each other when they're getting ready for the big day...but I just had to arrange this little preview.


Sunday, October 28, 2012

Til Undeath Do You Part

Well, they're getting closer to the big zombie betrothal. Only a couple of structural issues left, and then we're onto the blissful decorative portion of costume making. The painting is always my favourite part, which is a pity because it's always confined to the last couple of panicked days. My guy does have finished legs too, but they don't support the weight of the body on their own. Another issue to figure out...


("Undeath" seemed like an erroneous title, given that they are already undead, but Google failed to provide the answer. Unlife?)

Sunday, October 21, 2012

Sticking to what you know

Most of the best LEGO costumes I've seen have followed a similar method for making the head: a base and a top both made from styrofoam, with a strip of card folding around the diameter sandwiched between them. If that's not the best explanation, than see for yourself: two of my personal favourites can be found here and here.

Just about every costume I've done so far has prominently featured wire. Wire is great because it's almost limitless in what it can be shaped to. However, the method discussed above made a lot of sense. In previous costumes, wire was a good option because the head shapes were intricate. The head of a LEGO minifigure is quite straight forward, making styrofoam more appealing; the only work one would have to do is taper the edges into smooth curves. Furthermore, the infamous head is so smooth and free of imperfections I felt that it would be impossible to replicate that smoothness using the wire method. As well as it has served me, a smooth finish it does not always make. 

With this in mind, I decided to opt for styrofoam. I had enough to do the neck, which was straight forward and turned out as well as I'd hoped (see here). After this, I only had enough foam to make a start on the base; however, a start was all I could make. Days after making this start, I began to resent the difficulties I appeared to be having in sourcing more styrofoam for the project. In the end, I felt that I had to start thinking about contingencies. With this in mind, I began to experiment with a wire frame. 

This has so far proven to be quite fruitful, to the extent that I have abandoned my search for styrofoam. The smoothness issue I feared was addressed by overlaying the wire frame with very light cardboard (the flexible type that cereals are typically packaged in). Despite substituting styrofoam for wire, I have followed the base/top method outlined above. Here is a quick pictorial rundown of the progress so far (written instructions will eventually follow):

Lego homemade costume head

Lego homemade costume head

Lego homemade costume head

Lego homemade costume head

Lego homemade costume head

Lego homemade costume head

Lego homemade costume head

Lego homemade costume head

Lego homemade costume head

Lego homemade costume head

Lego homemade costume head

Lego homemade costume head

Change is as good as a rest

...or something along those lines, I believe. In an unprecedented move, I have changed my costume idea only a couple of short weeks before the big day (short weeks at the time I conceptualised the change; I'm avoiding eye contact with the calendar as I write this sentence). When I say that I have changed the costume idea, I don't mean wholesale changes; I mean more superficial ones. At the core, the costume is the same: I am still making what promises to be an unwieldy representation of a LEGO minifigure. Moreover, I am still making what promises to be an unwieldy but hopefully amusing LEGO zombie. Only the plastic shuffler will be different zombie from what I had planned.

When The LEGO Group released the Minifigures line in 2010 we were treated to the inaugural LEGO zombie minfigure. As I referenced a couple of posts back, this guy fast became a fan favourite and pretty hot property in the after-market. In 2012, however, TLG added to the portfolio of macabre minfigures with the release of the Monster Fighters line. Perhaps taking notes from the popularity of the original zombie, the theme contained a number of undead variants. This, in itself, didn't have too much of a bearing on my choice of zombie for Halloween purposes. However, when my girlfriend began her own search for a costume, a lightbulb was switched on somewhere above my head. 

Lego 9465 The Zombies
Introducing The Zombies: Mr. and Mrs.


This delightful couple appeared in set  9465: The Zombies. With Ciara in search of a costume, they came to mind as having the potential to be our first ever group-costume (indeed we have had some spectacular mismatches over the years; none more pronounced than my T-1000 in tow with her Guido from Pixar's Cars). 

Thankfully the transition from one zombie to another was smooth. I had not yet progressed beyond what I detailed in my previous post, and the core of the costume would be the same. I have now gone further with the costume, but I am still on the core elements rather than the decorative. Accordingly, I still have some design issues to negotiate. Specifically, I am now revisiting the idea of completely changing from the original zombie to the undead bridegroom. Instead, I am leaning towards an amalgamation which might look something like this:

lego zombie minifigure


Now, the purist in me feels like it should be one or the other. But logic dictates that this amalgamation would make the most sense for a number of reasons. Fundamentally, the original zombie's mouth is open wider. Given that I will be seeing through the mouth, this is very important. Besides, the amount of people on the night who would know the difference is minimal. 

The only real debatable point is the top hat; on the one hand, it highlights that the zombie is part of an undead wedding party. Seeing this version without the Bride by his side might not necessarily tell you this. On the other hand, including the top hat would hide the stud on this head: the quintessential feature of the LEGO minfigure. Given that I'm already deviating from tradition with grey rather than yellow skin, a part of me is worried that it might not be immediately identifiable as a LEGO minfigure full stop without it. This is one that I'm still negotiating, but mercifcully progress has been good and I have to decide pretty imminently.

Sunday, September 30, 2012

Breathing Unlife into Halloween 2012

Last year, I only managed to write my first entry 15 days before the big day; but I was knee deep in bits of wire that would ultimately become the Mayor much earlier than my tardiness would have you believe. My typical rule of thumb when it comes to Halloween is if I haven't started in August, it's time for panic stations. Going by this mantra, I should have been borderline hysterical by now. However, despite not starting until well into September, the costume has been ticking along rather nicely indeed. I'll keep all details until the final write-up, but here is a quick pictorial progress report on the work so far: 

Friday, November 11, 2011

Fully Built: Mike Wazowski!

mike wazowski monsters inc
Step 1: Take your Mr. Potato Head costume from last year's Halloween ball.

Given that the above was our first actual step towards building this costume, it makes this post tricky in terms of making it a full instructible article.

Thursday, November 10, 2011

Halloween 2011 in Pictures

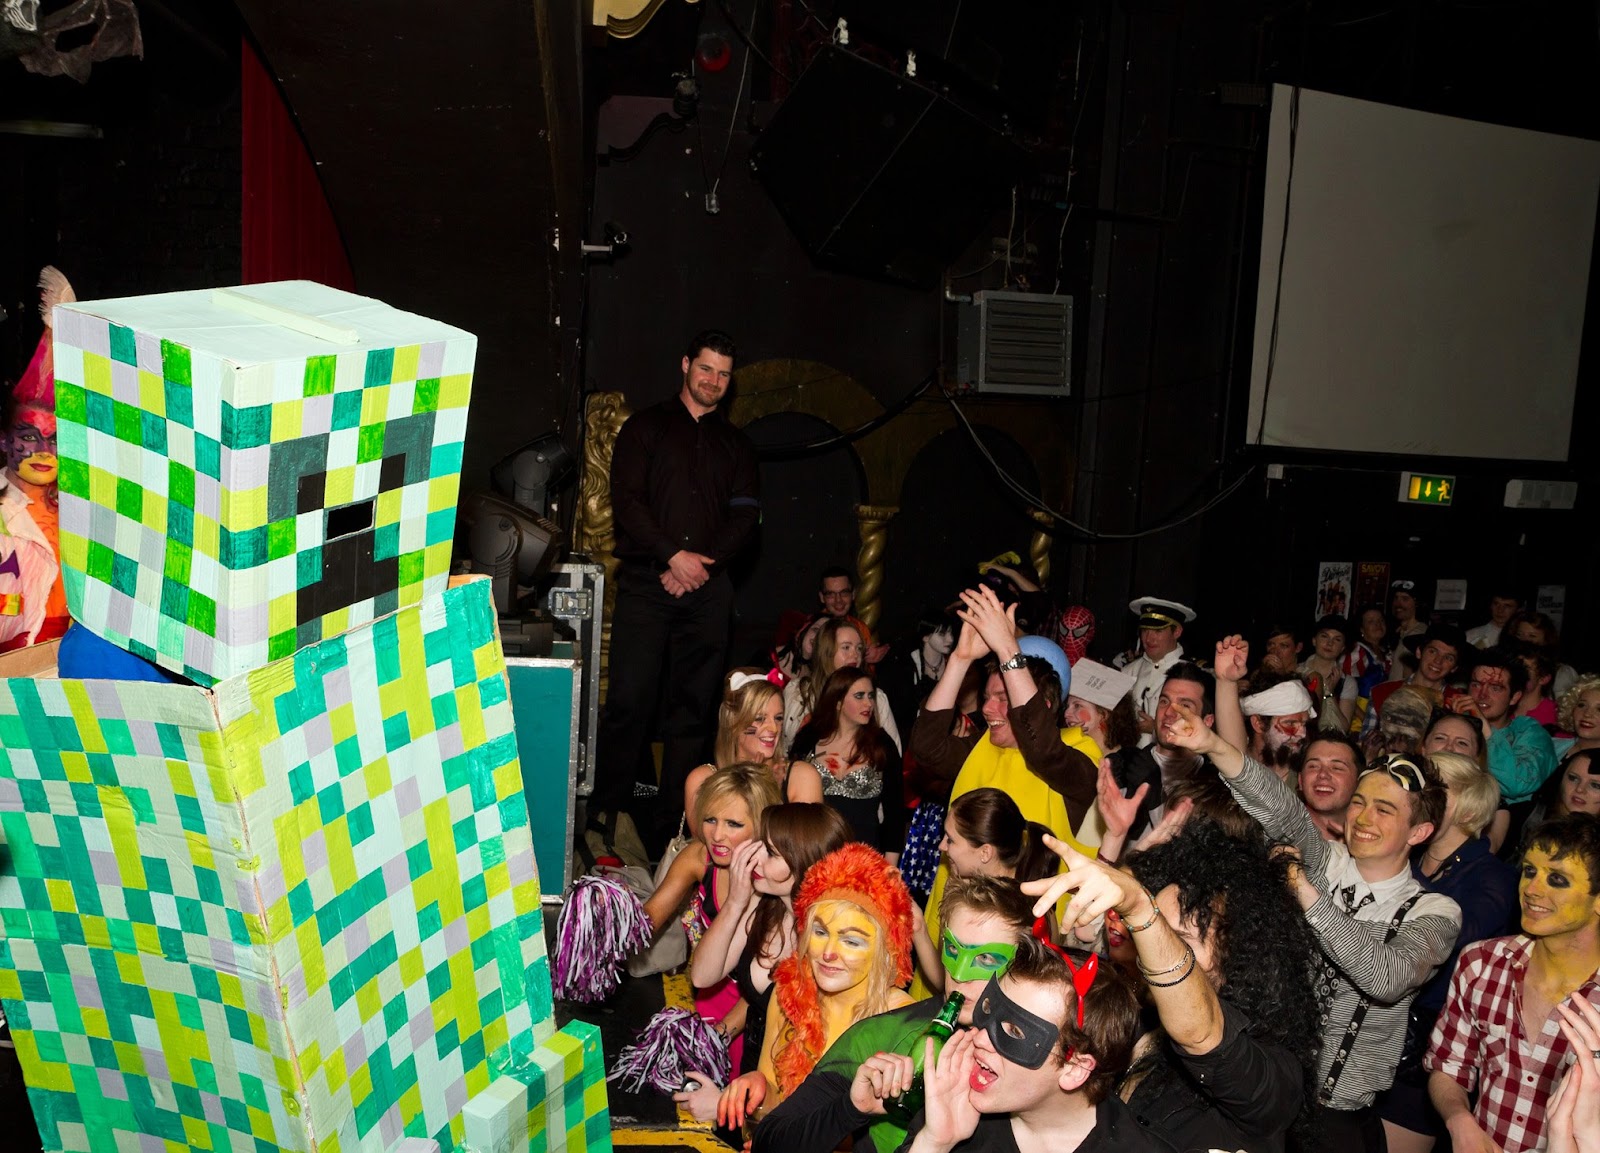
As alluded to in a previous post, I couldn't feasibly carry a camera while donning this year's costume. I was therefore dependent on others to capture the night in pictures; all of whom have been very gracious in sharing their work and allowing me to post the photos here. So thank you Johnny, Nathan and David from Freakscene, my sister Lisa/other half Andy, and Ciara for capturing some great moments. Note the fantastic portrayals of Mike Wazowski from Monsters, Inc. and a Creeper of Minecraft fame donned by Ciara and a friend of mine, Mark, respectively.

mayor nightmare before christmas costume
Happy

mayor nightmare before christmas costume
Is it an expression of sadness or irritation? I've never been able to decide. 

mayor nightmare before christmas costume
Mark and I shot by Freakscene photographer Nathan in their studio set up

Mike Wazowski monsters inc costume 
Studio shot of Ciara's Mike Wazowski

Ciara and I, our costumes linked by the most vague of Disney connections

 mayor nightmare before christmas costume
On the streets of Cork, I happily bemuse passers by

mayor nightmare before christmas costume
By happy coincidence, I ran into a total stranger portraying my film-mate Sally

muppets beaker costume
A cool Beaker costume receives runner up

minecraft creeper costume
Mark's Creeper is also shortlisted for the ceremony

mayor nightmare before christmas costume
This could be me celebrating victory, or it could be when I broke into awkward dance as 'This is Halloween' came on over the PA system. 

mayor nightmare before christmas costume
It wouldn't be Halloween without getting attacked by the dog. 


Saturday, October 22, 2011

See how I transformed this old rat into a most delightful hat...

From the outset I mentally divided the Mayor's construction into thirds: his head, his hat, and his body. Keeping this outlook, I can now say that I am two-thirds through the costume. Perhaps that is taking liberties given the proportionality of work between the hat and the body, but I'm going with it. The hat itself took longer than I expected it to, but I am content with the result. 

Sunday, October 16, 2011

We've got to find Jack! There's only 365 days left until next Halloween!

Well, not quite, unfortunately. 15 days and counting, and the pressure is on.

I certainly didn't expect to be making the first progress entry of 2011 on October 16th. What happened? Well, a combination of two factors; the first being real life commitments. The bane of Halloween costume making, which demands so much time toiling over rolls of wire, pots of paste, scraps of newspaper and scribbled blue-prints (for those costume elements that aren't composed completely off the cuff). The second factor has been the bigger of the two, but the more unexpected one: this has been my hardest costume yet.

Tuesday, September 6, 2011

Fully Built: Mr. Potato Head


mr potato head toy story


The construction of my Emporer Zurg costume was a collaborative effort. Without the help of my girlfriend, Ciara, I would not have gotten very far past the head and torso. Fabrics are just not my strong point. They are not any point on my skills radar, really. In return for Ciara's invaluable input to my Zurg costume, I helped her construct her Halloween 2010 costume. We decided to share a Pixar theme in our costumes, ultimately choosing Zurg's film compatriot Mr. Potato Head.

Sunday, September 4, 2011

Fully Built: T-1000

terminator t-1000

Maintaining a seasonal blog presents unique challenges. Forget the old SEO chessnuts of tagging, key words, descriptive titles, links to and from other blogs and so on; it's much harder not to let a blog die a death if you're not putting out fresh content on a regular basis. How do you achieve this when you're making one costume a year, and your blog is based on the costumes you make? Something I'm still trying to figure out. But for now, at least, we're approaching silly season again with Halloween very much on the horizon. Not for normal peoples' standards perhaps, but for me, I feel like I'm late in starting my costume. But more on that later.

For now, there is one more past costume to add to the index. The greatest movie villain of all time, bar none. Perfectly portrayed by Robert Patrick: Terminator 2: Judgement Day's T-1000.

Monday, June 6, 2011

Fully Built: Alien

Xenomorph

After the success that 2007 brought it did not take long to decide what costume I would be donning in 2008; indeed the seeds were planted in my head while putting the finishing touches to Predator. It seemed logical (with a trace of obscenity) to succeed a Predator costume with its long-time, cross-franchise foe: the Xenomorph.

Friday, February 4, 2011

Fully Built: Predator

predator
 
Continuing the theme of wishing I started this 5 years ago rather than playing catch up now, I present the chronology of my Predator costume from Halloween 2007. This was the first time I saw Halloween as a serious project, so I have a lot more photos of the production process than I did of Ash.

Tuesday, November 2, 2010

Fully Built: Zurg


emporer zurg toy story

The cumulative effort which went into Zurg is split into a number of different posts here; but I wanted to compile all the photos which were taken from beginning to end (significanly less towards the end, as I struggled for time) to show the evolution of the costume. It invariably starts with a piece of wire, and a simple shape.

Tuesday, October 19, 2010

The Emperor's New Torso

I've taken a break from the Ion Blaster, because I was becoming self-concious about not having started the body.

I decided to tackle the torso first (still figuring out the midriff and the lower body). To do this, I started by acquiring a large, flat cardboard box (below).

Sunday, September 19, 2010

Phase 1: Papier Mache; Phase 2: ??? Phase 3: Profit

Despite setting a deadline for this week that I haven't quite met, I'm happy enough with my progress. I now have the head entirely papier mached, as well as the three barrels of the Ion Blaster.